Before you go down the self-publishing path, I will tell you that you need to be prepared for a long journey if you want to have a quality product. Like most things, you have to put in the time and/or money for it to be truly great. Embrace this reality. I wrote this article to help folks get a look into some of the main actions you’ll need to take to self-publish your book. And to help with readability, this article is broken up into the following main sections:
- Funding the Project
- Creating the Book: Creative Process
- Printing the Book
- Sales and Distribution
- Marketing
- Business and Legal
- Accounting and Taxes
Now, let’s begin with the first question: How are you going to pay for this project?!?
Funding the Project
Self-publishing a children’s book can cost $5000-$20,000, or more. It depends on the overall quality you want, where you hire people, your timeline, how much you can do yourself, and all other related materials that you might need (for example, bookmarks, or other marketing materials). You can expect to pay a children’s book illustrator between $5000 and $15000. Again, this will be dependent on the page count, the number of revisions, the quality of the art, and more.
To fund this, you kind of have four options:
- Save your money and pay 100% out of pocket.
- Take out a loan.
- Raise money on a crowdfunding campaign like Indiegogo to offset your costs.
- Rob a bank.
I think #1 and #3 make the most sense for self-publishing a single title of a book. #4 is never really a good option.
But you have to decide what type of project this is going to be for you (i.e. are you all in? is it just for fun?), what you can afford, and what risk you are willing to take on it.
What’s important to remember with physical products is that when you cut corners, it can be incredibly obvious to the consumer. Consumers are holding the product in their hands. They will know when: the pages feel cheap, the colors look faded, or the art looks second-rate. So, don’t focus on getting it done as cheap as possible: find a balance between cost and quality.
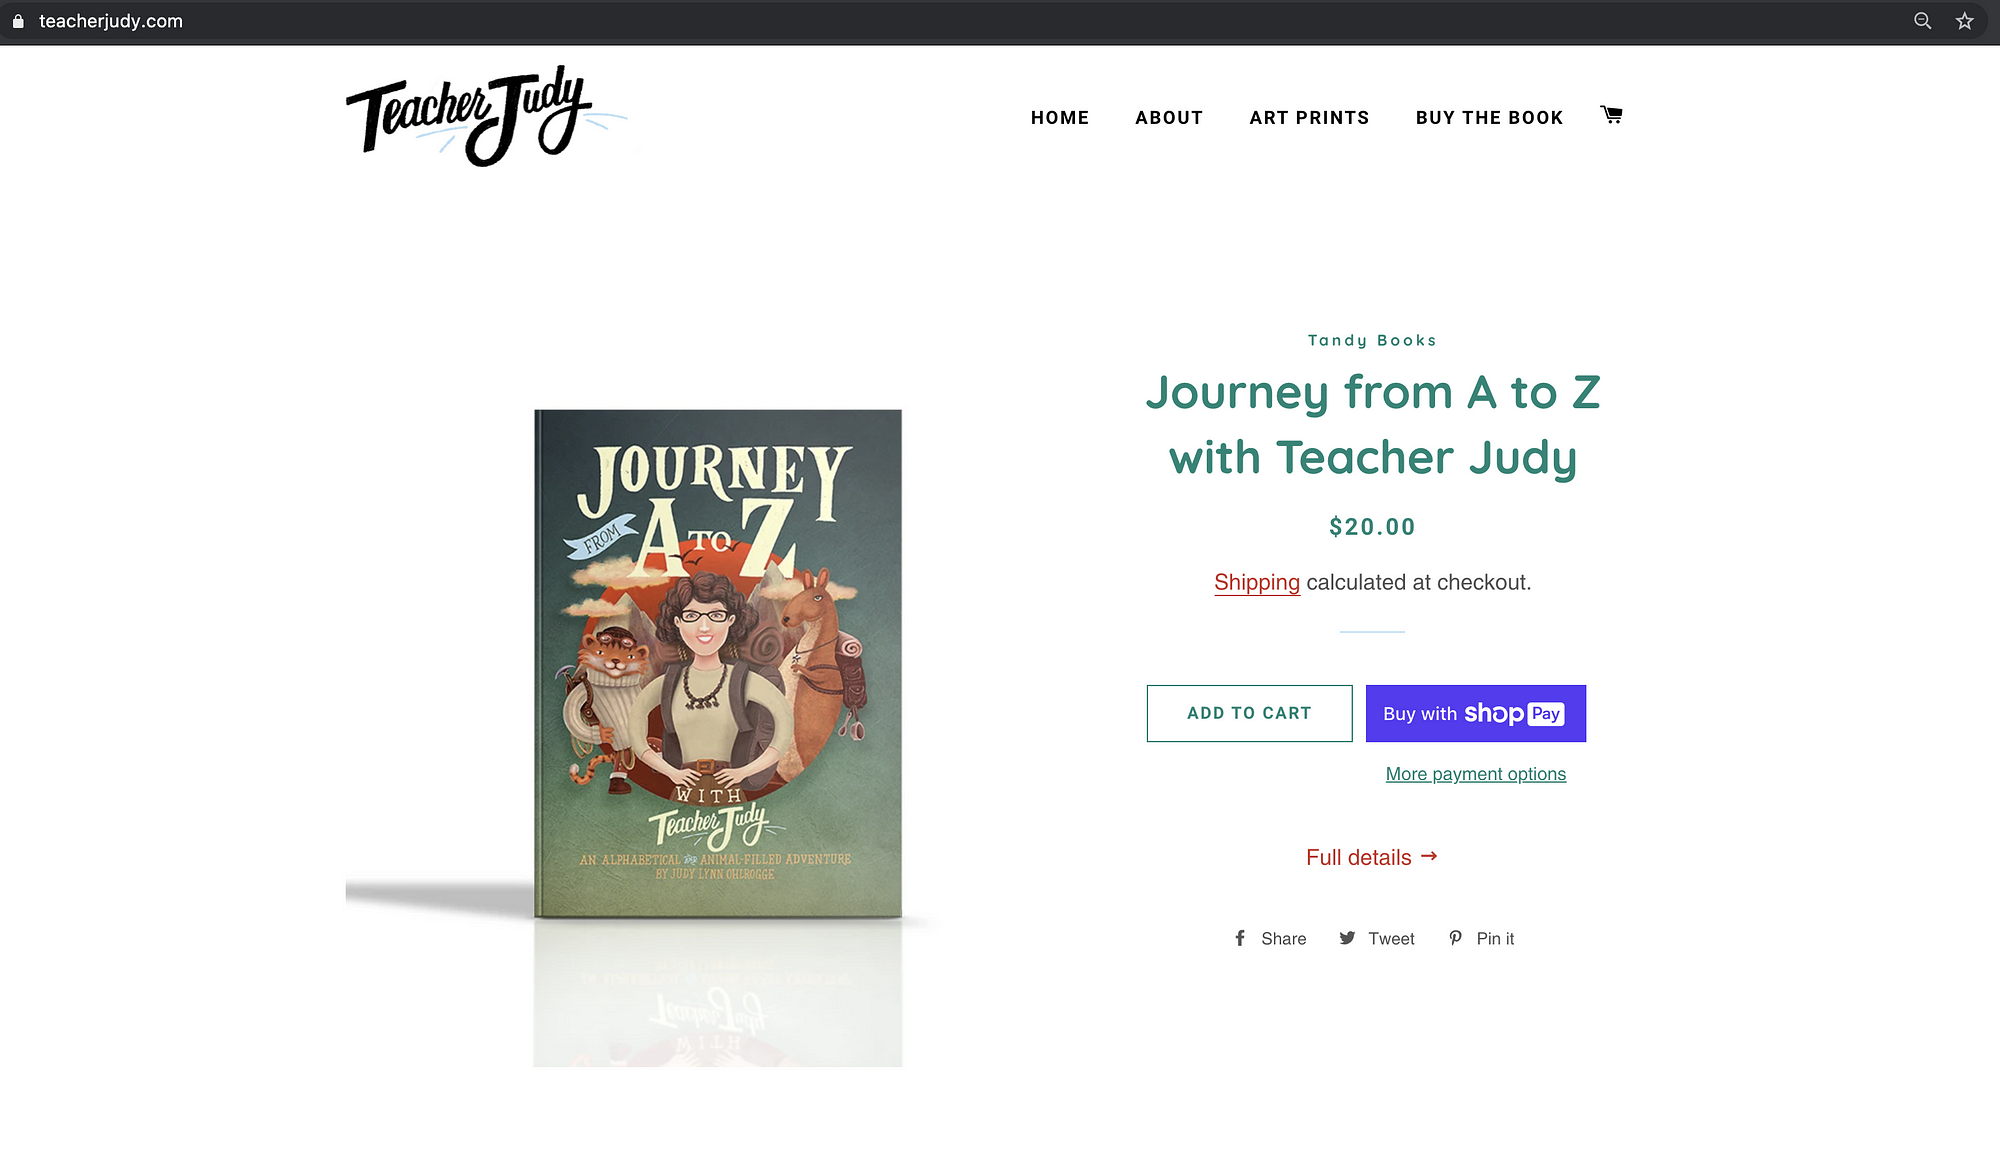
In the case of Journey from A to Z with Teacher Judy, I ran an Indiegogo campaign that raised $20,000. The perks I sold were related to copies of the book, or were adjacent products that leveraged illustrations from the book, like art prints. However, I also put a lot of my own money into the creation of the book, the publishing company, and initial marketing of if during the Indiegogo campaign period.
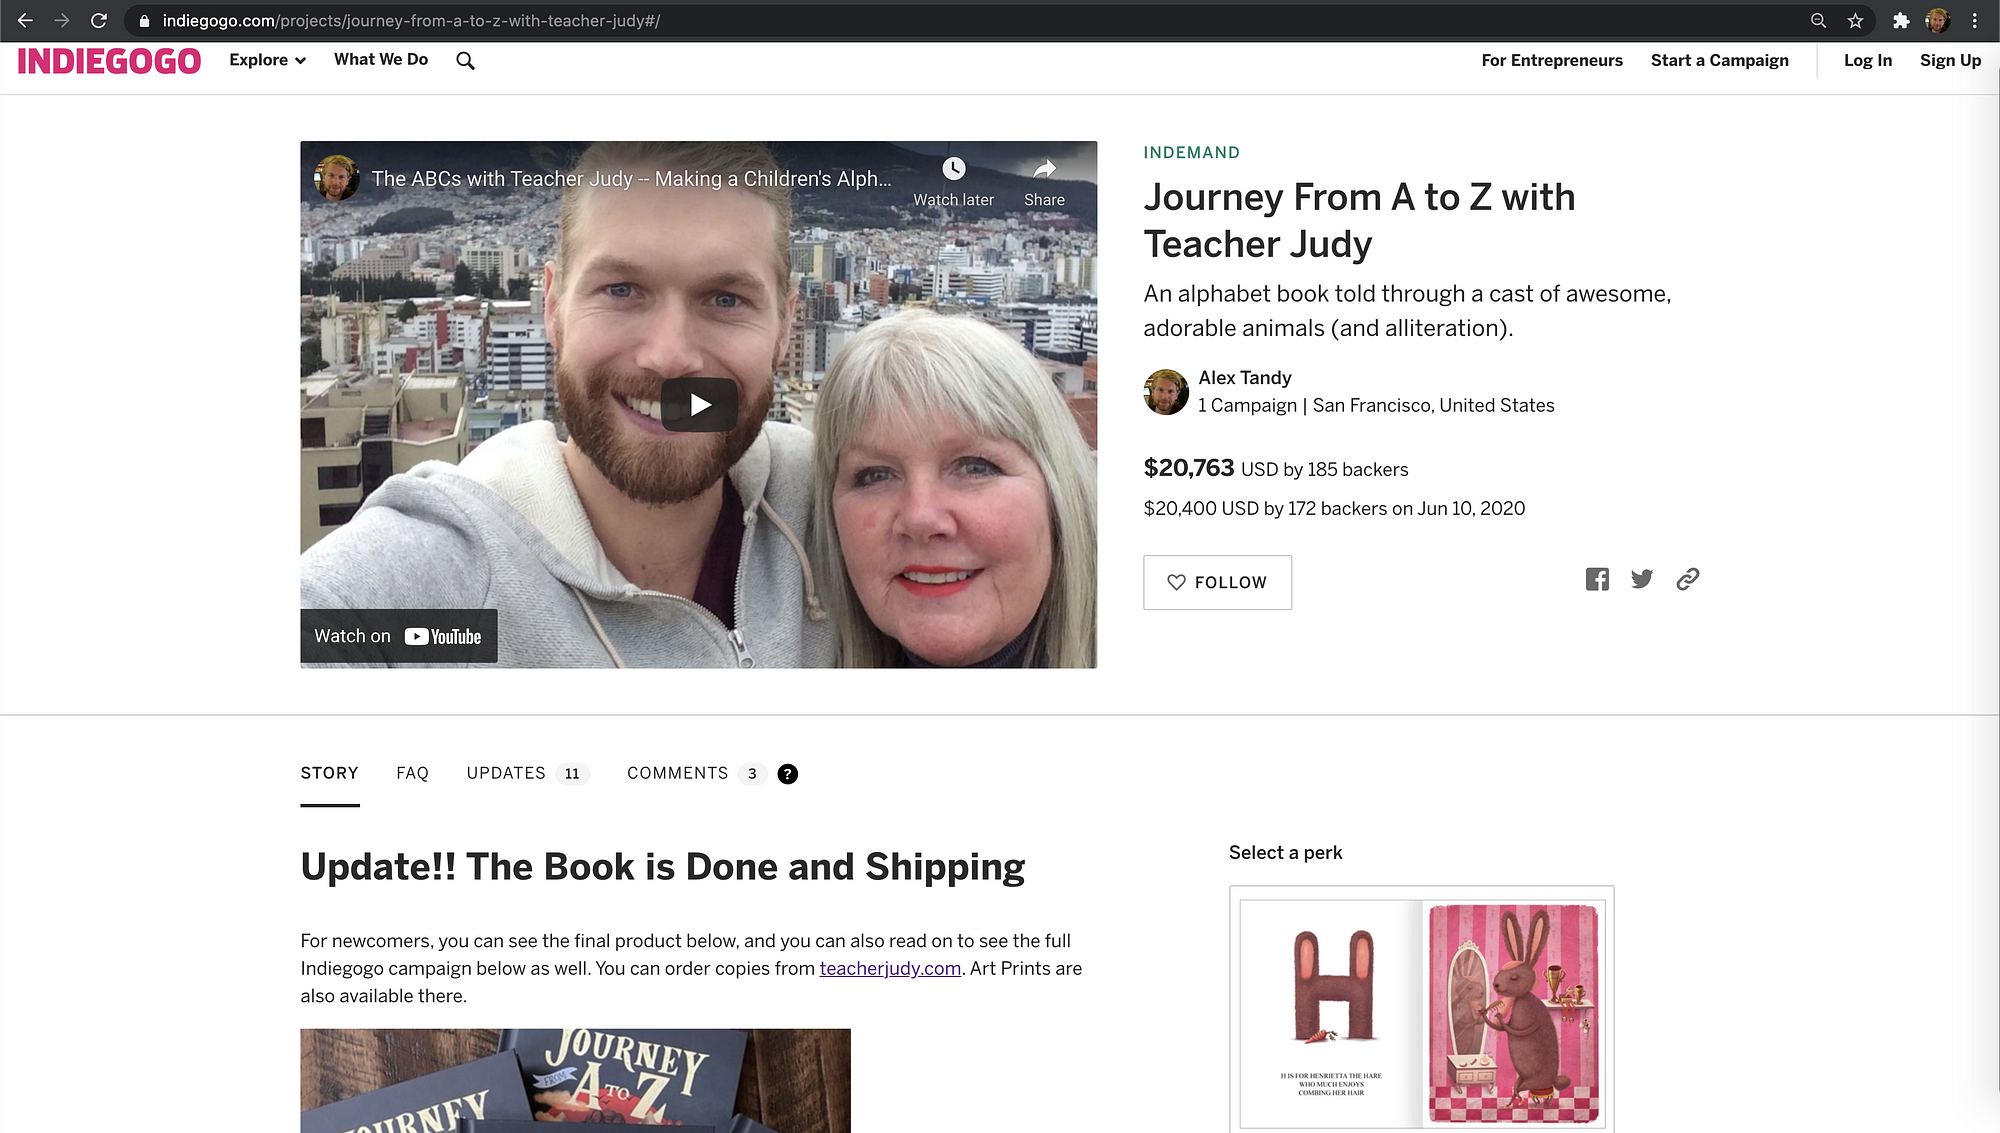
Not all books cost $20,000+ (especially if you are the artist), and I definitely made some costly mistakes along the way. That said, running a crowdfunding campaign can be terrific because it gives you a chance to start marketing the book, capture pre-orders (which help you determine how many copies you should actually print), and leverage your network to help support your project and keep you motivated and focused on finishing.
Creating the Book: Creative Process
This section is all about the process of creating the book — writing, design and illustration.
Writing and Outlining
- Create an outline — for the book and the way the pages should flow. Identify where you would want illustrations, and where the text might be comparatively.
- Write the manuscript (and edit it a million times) — can’t have a book if you don’t have a story.
- Have the manuscript reviewed (and edited a million times) — can’t have a good book if you don’t share it with others to help you make it better. Well, maybe you can, but you’d be pushing your luck.
Hire an Illustrator
If you are going to be illustrating the book, then lucky you, you’re going to save a ton of money. But if you’re not the illustrator, then you’ll have to hire one. If you don’t know any, you can find them via freelancing platforms like Upwork (which is where I actually did hire our illustrator). You can also try to find them on Instagram/Behance, and then DM them inquiring about the project. But before you do that, you should really…
- Put Together a Creative Brief — You write a creative brief to let artists know what the project is about and to try to find an artist who is a good fit. You also use the brief to help find someone who fits the style that you are looking for. And if you don’t know the style you’re looking for, well, this process is intended to help you decide. For writing the brief: state what the project is and what you are looking for, and put together a mood board of images. In the case of Journey from A to Z with Teacher Judy, I went on Instagram and searched for #childrensbooks hashtag, or #childrensbookillustrator, etc. I then saved images of the ones that I liked. If you then open Instagram on the web, you can see all of the photos together and screenshot them. 🙂
- Illustration Drafts/Sketches — Be prepared to pay for some drafts/sketches, from any of the artists you are considering working with. this will help you feel comfortable that you are going to get a style that you like.

Book Design and Illustration
These are some of the steps and items you’ll need to consider in the book design.
- Cover Design — this is often done after the interior pages, or overall, the last thing of the project. You can expect to pay between $500 and $1500 for a good cover design. Remember that the cover includes: Front/Back/Spine. Good covers help sell the book. You know this. When was the last time you picked up a book without first looking at the cover? Never. Don’t pretend the cover doesn’t matter.
- Include “front matter” in the book, including any title page, and copyright page where you declare the copyright, “illustrated by”, and more.
- End Sheets — these pages are featured at the beginning and end of the book and often have pretty colors or custom designs. This is part of the overall book’s design. People do really cool things with endsheets, so, while it’s really part of the “printing” process, I think it’s important to think about this while doing the overall book design.
- Spine Design — this should be included in the cover design because the covers are printed as an entire label that wraps around front, spine, and back of the book’s coverboard. However, it’s important to not forget the spine (which is why I’ve made it its own bullet point). Do not underestimate the spine — it’s important when you consider how a book looks on a shelf, and how legible certain components are for librarians and bookstores — anyone who needs to put or pull the book from a shelf or organize it against other books by title/author.
- Create a Copyright page — do not forget the ISBN/library of congress numbers, crediting any contributors, the publishing company name, or others.
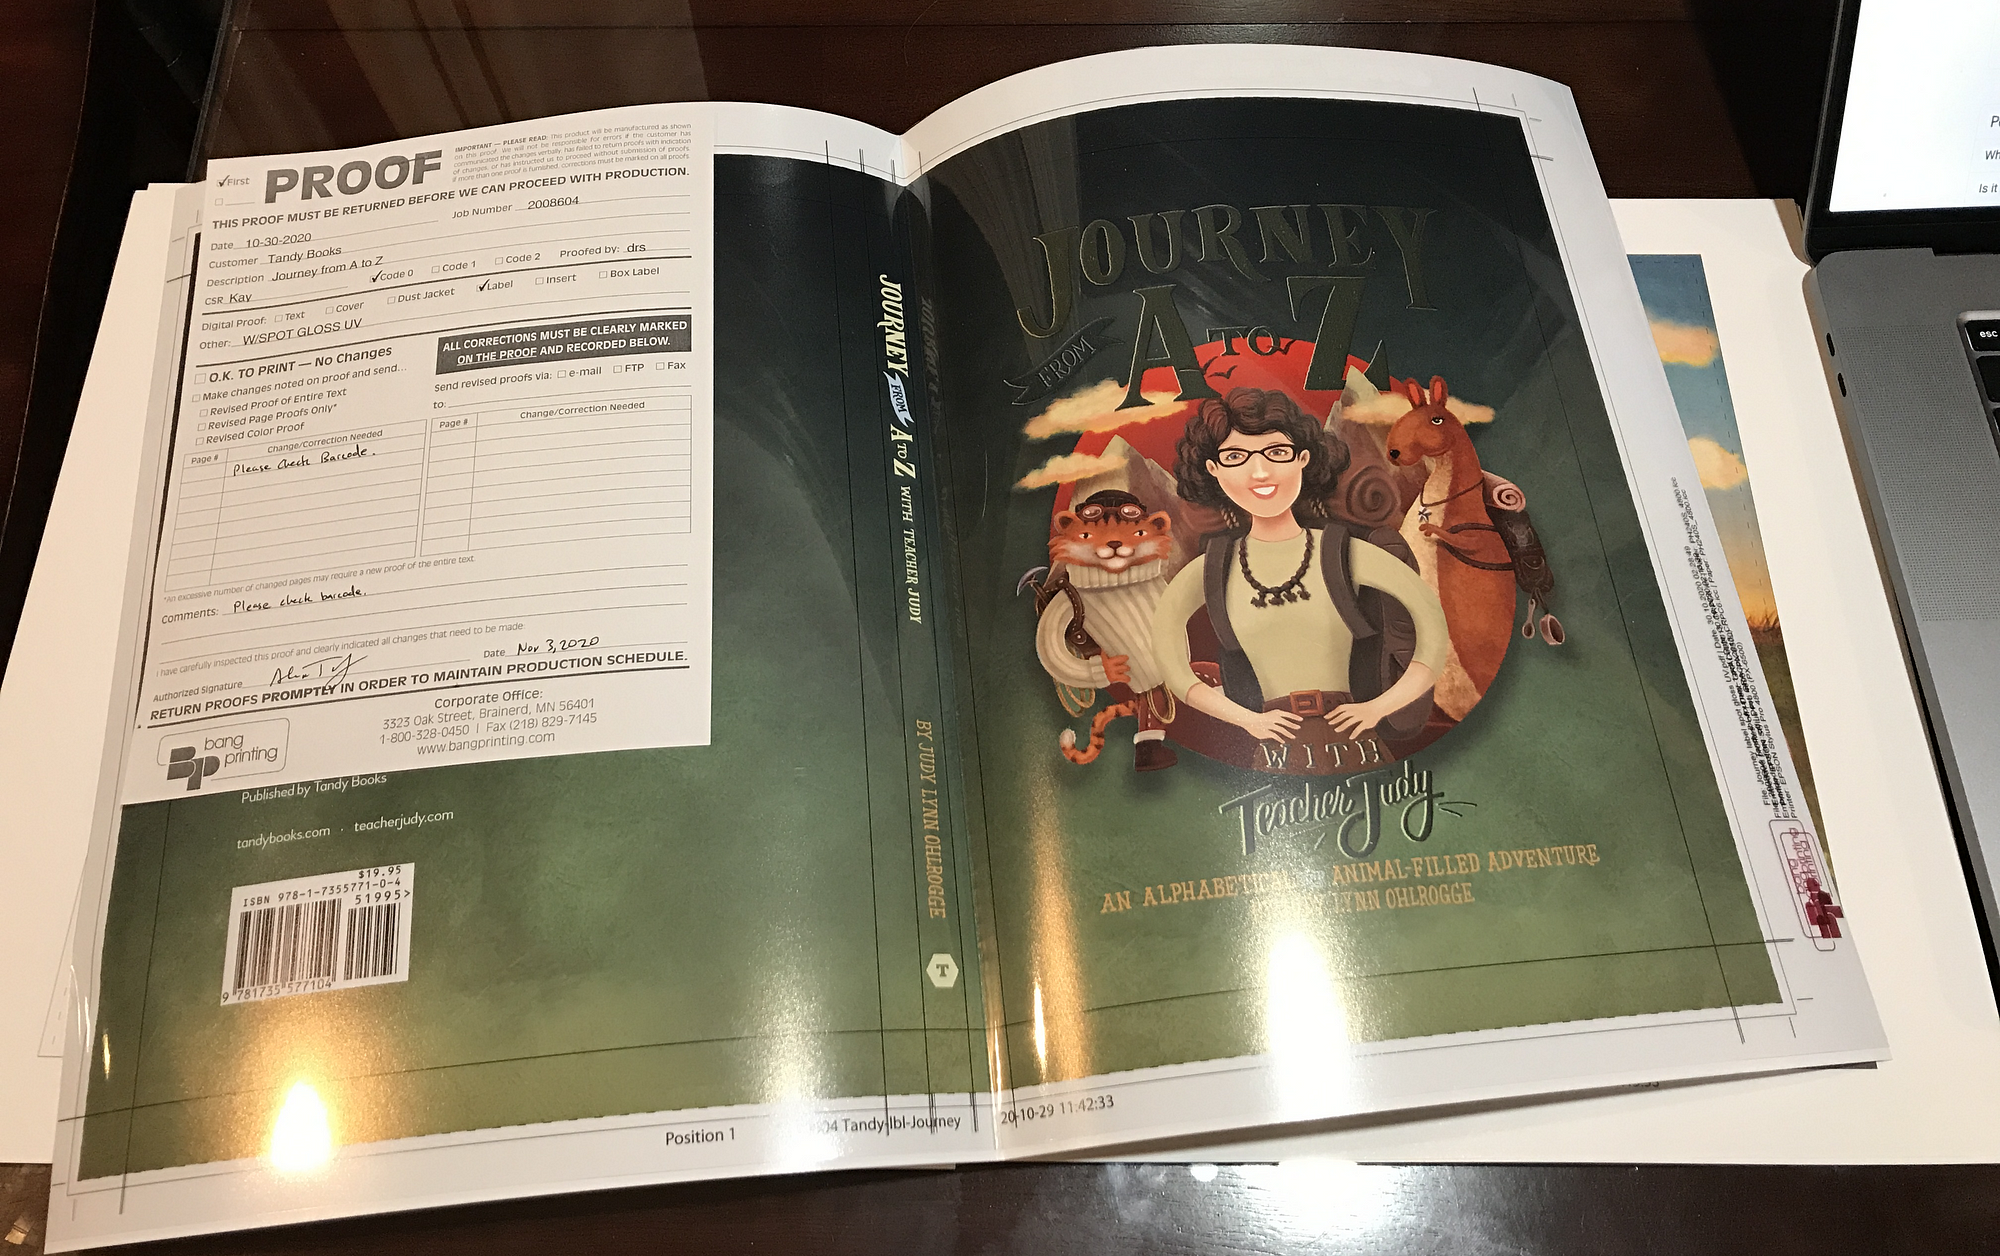
- Create a barcode. I’m sorry, this isn’t really a “creative” step, per se, but you should do it nonetheless if you want to have your book listed on marketplaces and in bookstores. To do this, you’ll want to pick a price for your book. You can get a barcode through Bowker (and other places).
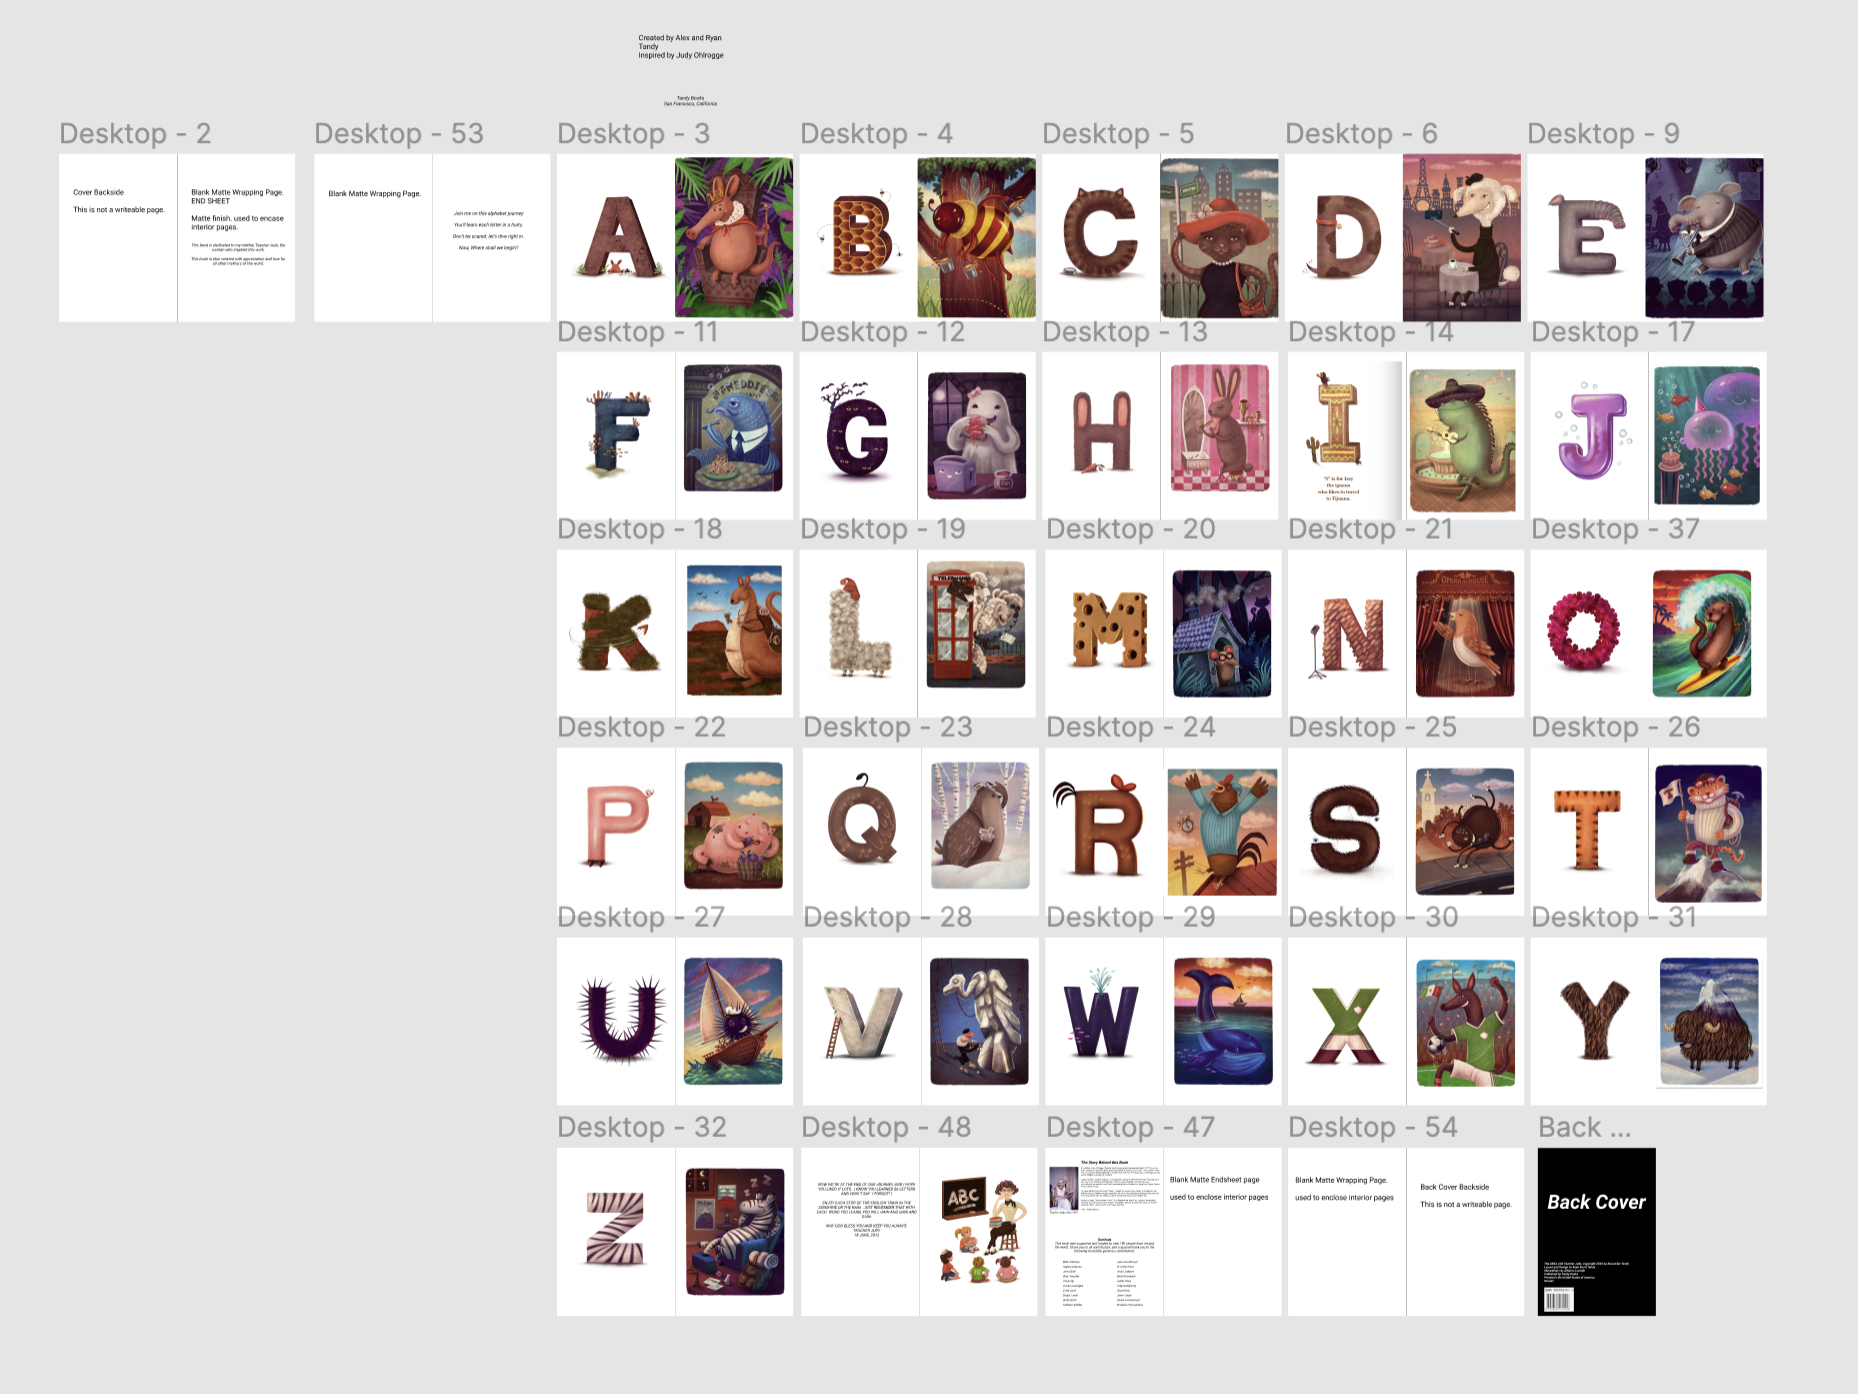
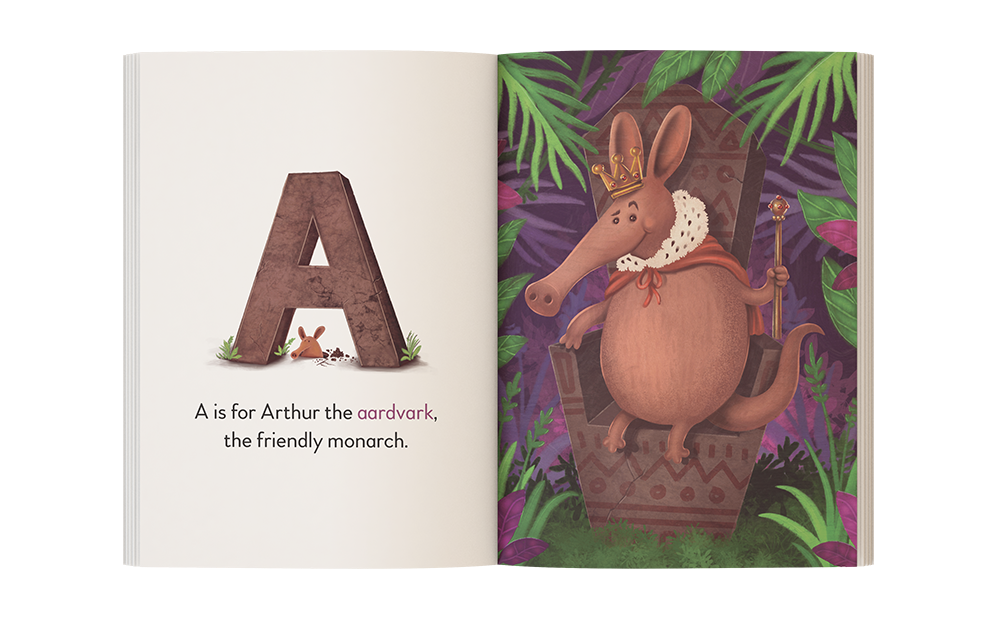
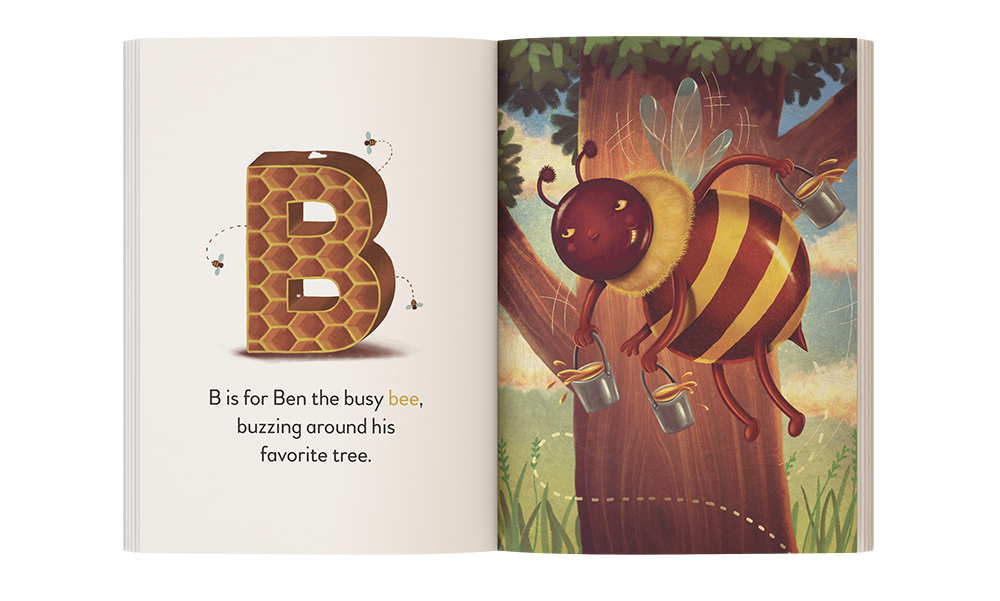
Here are some of the pages of the final product of the book!

Printing the Book
Well. I hate to tell you, but this part can be super easy, or super hard. The sky is the limit when it comes to challenging yourself here. Why? We’re getting there!
- Picking a printing method — You can go with digital printing, or you can go with traditional offset printing. Offset costs more money, takes more time, and does not support a Print On Demand model. If you don’t know what Print on Demand model is, it’s basically a model that enables your book to be printed and created to match the incoming/current orders you need to fulfill. A main benefit of POD is that you don’t need to worry about storing physical inventory and deciding how many books to print. Whereas, if you go with offset printing method and a traditional printer, then you will have to pick how many books you want to print and you’ll have to find a place to store them.
- Selecting the paper — weight and type. Do you want thick or thin pages? Do you want to have a glossy or matte finish on your pages? You’ll have to do research here and get paper samples. Printers like Print Ninja offer sample packs.
- Endsheets — I mentioned this before, but you will need to figure out 1) if you want endsheets, and if you do, 2) what paper weight they will be and 3) what color/design they will have.
- Select a printer: If you don’t know anything about printing, then I think my first suggestion to you would be to get some samples and literature from Print Ninja, which will also include information about some of the main choices you’ll need to make for printing your book (e.g. page weight, cover style, endsheets, etc.)
- Pre-Press Process — If you’ve gone with offset printing and selected a traditional printer, you will have more work ahead of you. You will need to have files prepared according to whatever requirements they have as a printer. In some cases, traditional printers will have Guides that can be used in InDesign, which your book designer can just import and work with.
- Proof creation and review — traditional printers should provide you with proofs to see some of the colors and to confirm that what they will be printing. Proofs are important because you will get to see what will actually be printed.
Sales and Distribution
Assuming you are planning on selling your book, you’re going to need to figure out how you will sell it and distribute it to customers. You can either sell the book online, offline (in brick and mortar stores), or both. If you run an online store, you’ll hopefully get orders, and when you get orders, you’re going to need to fulfill them and get the physical books mailed to your customers. How will you do that?
Sales Channels
- Decide on your Sales Channels — You can run your own online ecomm store, or list the product on marketplaces (e.g. Amazon, eBay), or both. The related challenge here will be how you will fulfill orders for each of those channels. Basically, where will you sell books and how will they get to the recipients?
- Fulfillment Process — Will you fulfill all orders by yourself by going down to the post office? Or will you pay someone to do this for you? Welcome to a new world of wild stuff to learn. There are 3rd-party companies that you can use to fulfill all orders that come in to you. If you go this route, you will have to determine if the cost of doing this makes sense, and you will also need to figure out how you will get the orders to the 3rd party company. I personally selected a fulfillment company that also stores all of my inventory. Two examples of 3rd-party fulfillment companies are: Shipmonk, and Shipnation.
- Order tracking and management — Whatever you do, I want to be clear that you need to set up a good system to manage and track your orders, especially if your orders are being generated through multiple sales channels.
Marketing
It’s hard to sell books that nobody knows about… So you will have to get the word out about the book. Here are some things you should consider for handling marketing.
- Website Setup — this is one of the first tasks you’ll want to complete, because it can be core to your book’s online presence. The website in question may act as one of your Sales Channels (for example, a Shopify Store where people can actually buy the book from directly). However, the website may also just contain information about the book, include pretty images of it, and info about the author and the publishing company, for example. Consider using Squarespace or Wix to build a simple marketing website, or using Shopify for building an ecommerce store.
- Competitions/Awards — decide if this strategy makes sense for you, but there are awards and competitions that you can submit your book to; for example, Moonbeam Awards and Independent Publisher Book Awards. I honestly don’t know if these are worth it yet. But I do think winning and listing awards can help you establish credibility and trust with potential customers who may be buying your product online (and aren’t able to touch it before buying). Keep in mind that there are deadlines for these things and you don’t want to wait to submit your book year(s) after it has been published because they don’t want 3-year old books entering their contests for the current year.
- Marketing Collateral — develop bookmarks, and other things, like stationary and promotional collateral to help make you have professional presentation that is on par with your book’s quality.
- Digital Ads — It’s a whole thing. You’ve heard of them. You’ve seen them. Here are some places you can run your ads: Facebook, Instagram, Pinterest, Google, and Twitter. I can’t comment on the best fit, but social networks can be a decent fit because of your audience targeting options.
- Outreach to bookstores — if you want your book in bookstores, you have a long road ahead of you here. Your best bet is to collect bookstore contact information, find your local bookstores, and talk to someone there to ask about their process. I can tell you that I’ve walked into a few and sometimes they work on consignment, and I if I recall correctly, I was offered a 60–40 revenue split. 60 for you, 40 for them. I might have that wrong though, so imagine that it was at least 30–60% of a sale going to the retail store.
- Outreach to libraries — similar to bookstores, you may want to reach out to some local libraries and school libraries to understand the possible opportunity of getting your book in there.
- Book reviews — if you own your online store, set up reviewing on your store itself. If you are selling on Amazon, get people to review your book. If you’ve pre-sold books, ask the buyers to review your book. Social capital and signals play a huge part in an online buyer’s decision-making progress.
- Social Media Presence — I almost forgot this, but how could I! Facebook, Instagram, LinkedIn, Twitter. You can start with these, maybe just pick two like Facebook and Instagram and focus on those if you don’t have the resources to focus on the other ones.
Business and Legal
This part was not my favorite part of the whole process. There’s a lot more to it than I share below, but here goes.
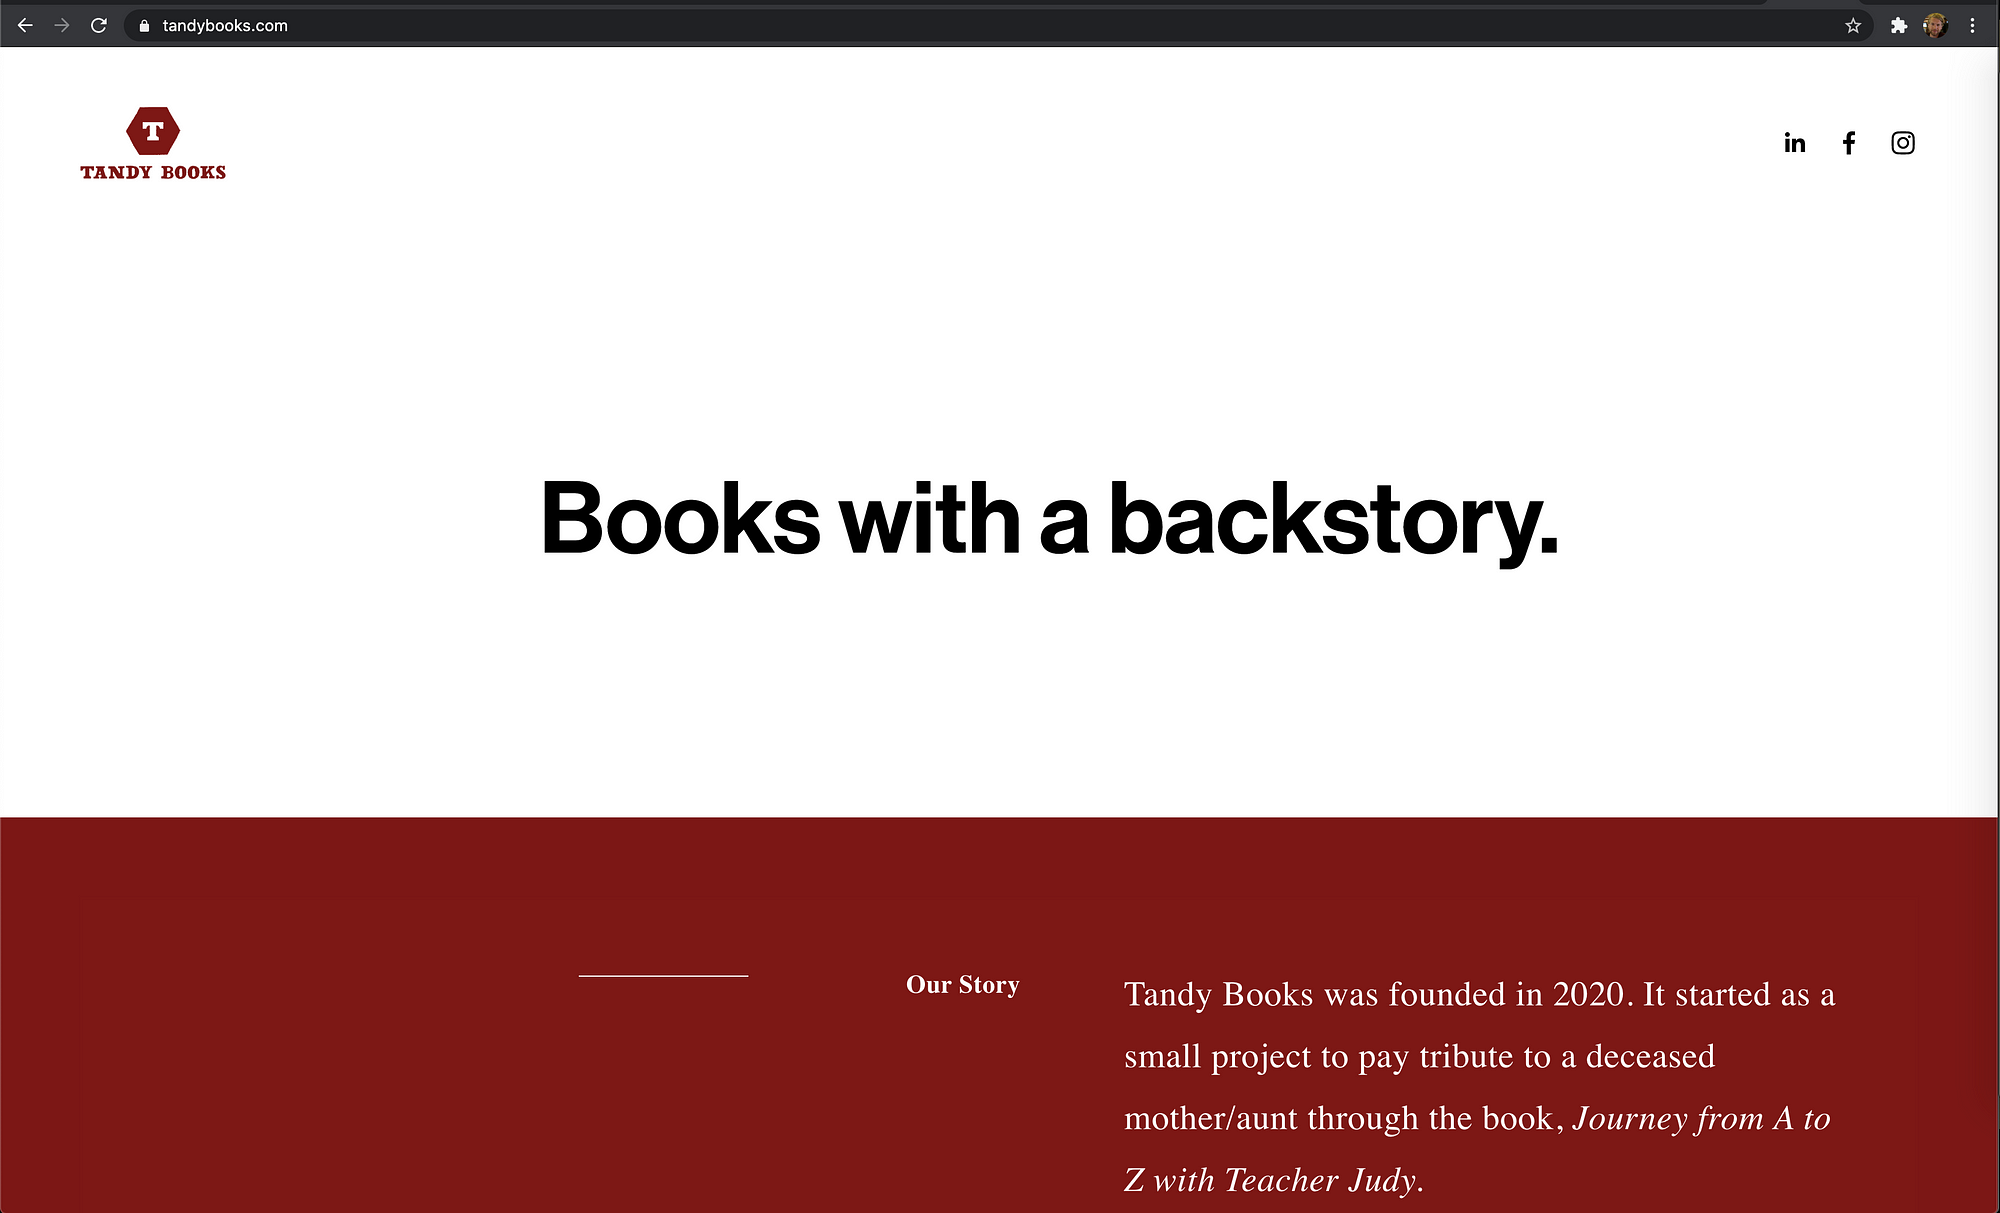
- Decide on your publishing company name — If you really want to have a professional, self-published book, you should have a publishing company name, and it should be a part of the book design.

Here are some sketches I originally did for the logo

- You can OPTIONALLY set up an LLC/business (if you decide to have a separate entity for the publishing company). There are lots of articles out there to help you decide this. I set up an LLC with the name basically matching the name of the publishing company. For example: Tandy Books LLC. And the publishing company’s name is Tandy Books (tandybooks.com). This simplifies the need in a lot of cases of needing a DBA or anything else. Do not just do this just because you are reading this Medium article… because you can self-publish a book WITHOUT a LLC/business entity. Do your own research here: like most of the points here, there is much more to them than I have written.
I put the next two under the business/legal section, but they could be under the book design section (because you will probably want to print both inside of your Copyright page).
- Get an ISBN — This can be done at Bowker, you probably only need to buy 1, but you can buy more if you think you will have different versions of the book. A different version might include changes to the book in terms of size, design, or the interior creative of the book as well. The ISBN helps you be more official and is a number for identifying your book that is used in many places throughout the publishing industry, including bookstores and libraries.
- Library of Congress Control Number — this is just one of those things you can Google how to do. I added the LCCN because it adds additional professional level to the book and can be a useful identifier for your book.
Accounting and Taxes
I dropped out of Accounting 101 in college because I disliked it so much. Well, here I am now in charge of doing my own books. And maybe you will be too. Also, I think the only people who like taxes are, 1) people who prepare them for a living, and 2) the government. So yah, most of us share common ground on the topic of disliking taxes. Anyway…
Accounting Software
- The big thing here is that you need to have some sort of accounting software to keep track of all of your expenses and sales. I got started with WaveApps because it was free. But of course, many people use Quickbooks. I don’t have any great tips for your here other than being diligent about recording any expense related to your book, and make it easy to retrieve that data in a structured format (e.g. CSV, Excel sheet, etc.)
Taxes
- Sales Tax — Laws will be different depending on the states you operate in. You will need to figure out how you will handle Sales Tax and what your requirements are. If you use platforms like Shopify, Amazon, etc., they typically have tools for handling Sales Tax.
- General/Income Tax — Yes, if you make money on this thing, you’ll have to record those sales and income earned. You’ll have to pay taxes on your total earnings to the federal government. Easy to forget? Maybe! But try not to!
Closing Thoughts
What else can I tell you? Self-publishing a book is a lot of work. But that doesn’t mean you shouldn’t do it!
All told, it took me 1.5 years and a lot of money to get Journey from A to Z with Teacher Judy self-published. No clue on the total hours I spent on this— a zillion? That said, the journey is really special and you will have some amazing ups and downs during the process. Try to enjoy it; especially when the product is completed!
Here are two pieces of advice for you:
- Find people who can help you. In my case, I had the help of my cousin, Ryan Scott Tandy, a very senior design leader with a lot of experience in traditional and digital product design. In addition, I had amazing support from all the contributors to the Indiegogo campaign. This was invaluable for keeping me motivated and powered with love.
- Find something that you are passionate about finishing. In my case, I was on a mission to complete my late mother’s book and pay tribute to her life and efforts as a teacher. Leaving it unfinished would have been criminal in my mind. Perhaps you can find a mission that will deeply compel you as well.
I wish you luck on your journey.